Start automation script
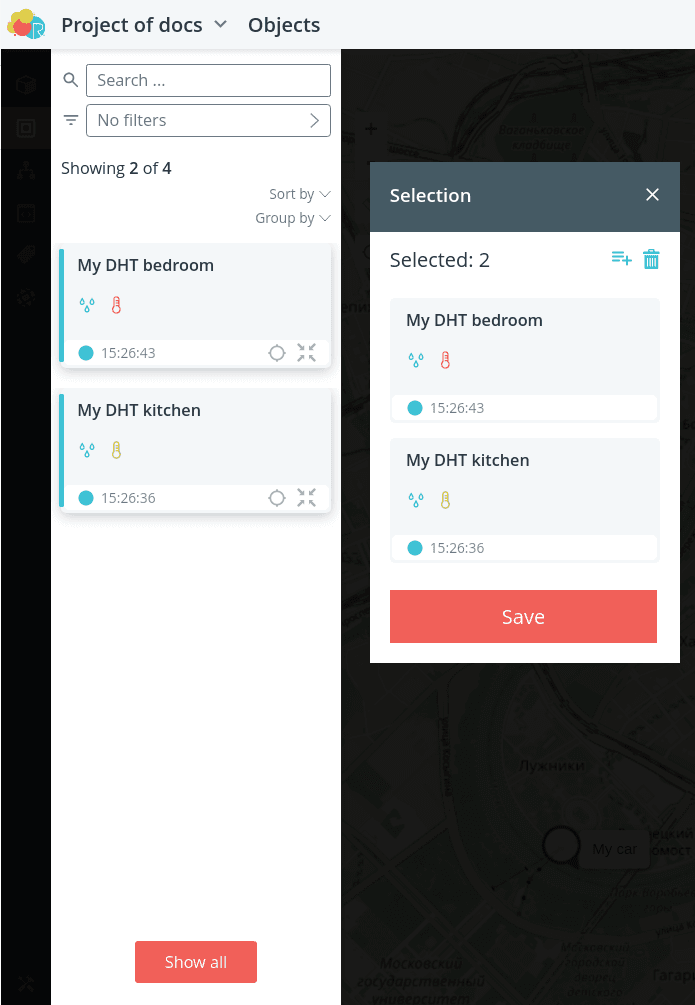
To assign an automaton to objects, go to Objects.

Click on Add and click on the cards of those objects for which
this automaton will be executed for.
Note that the list shows objects with the model that the automaton
the automaton is using. If you want to add an automaton to an object with a different model,
click on the Show All button, then the full list of objects will be displayed.
of the current project.
💡
You can add an automaton to an object with a different model than the one that is
is used in the automaton. However, it should be taken into account that in this case it will
work only if the identifiers of the parameters, commands and events used in the automaton from the model of the automaton and from the model of the automaton.
parameters, commands and events from the automaton model and from the model of the object being added.
of the object to be added. Let's assume that the automaton is formed for Model1 model.
In one of the conditions of the automaton there is a parameter with the identifier
temperature. You want to add this automaton to the object with Model1 and to the object with Model2, because the logic of working with Model1 and Model2.
Model2, because the logic of working with these objects is the same, and their models
differ slightly. Then for the automaton to work correctly on the second
object in Model2 must also have a parameter with the identifier
temperature.

Click on the Save button, the objects will appear in the list, which are
which is clickable rows. Highlight the rows with the objects you want to run the automaton for.
you want to run the automaton for, they will be highlighted in blue:
-
to select a single object, click on its row;
-
to select several non-sequential lines, click on each of them, while holding down the Ctrl key;
-
to select several consecutive rows (range), click on the first row of the range, press the Ctrl key. line of the range, press the Shift key and click on the last line of the range; 3. of the range;
-
to select all objects from the list, click Select All.
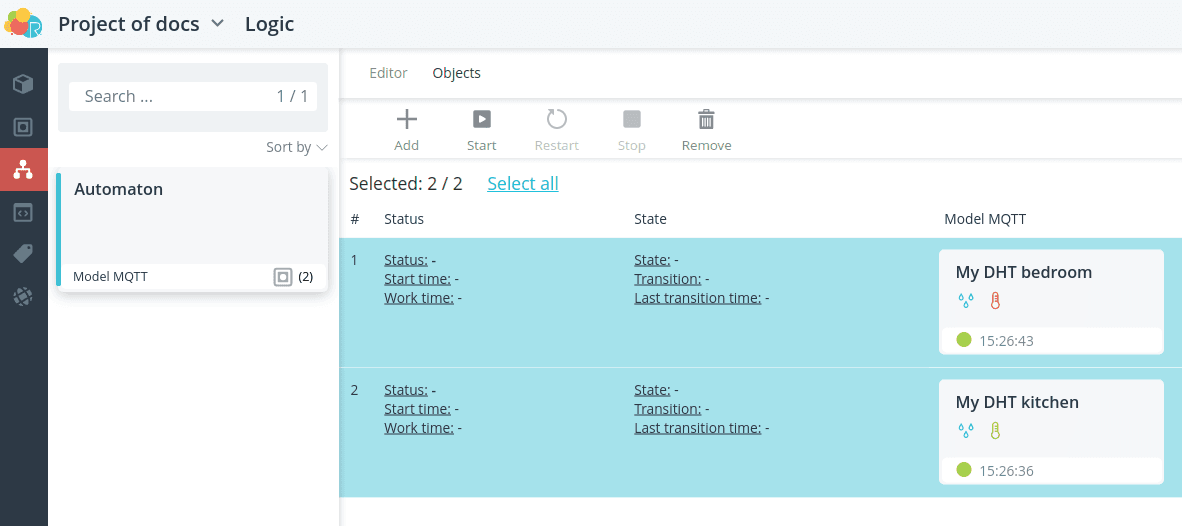
The Start and Delete buttons will become available for all selected objects.
Click on the Start button - the status of the automaton will change to Started.
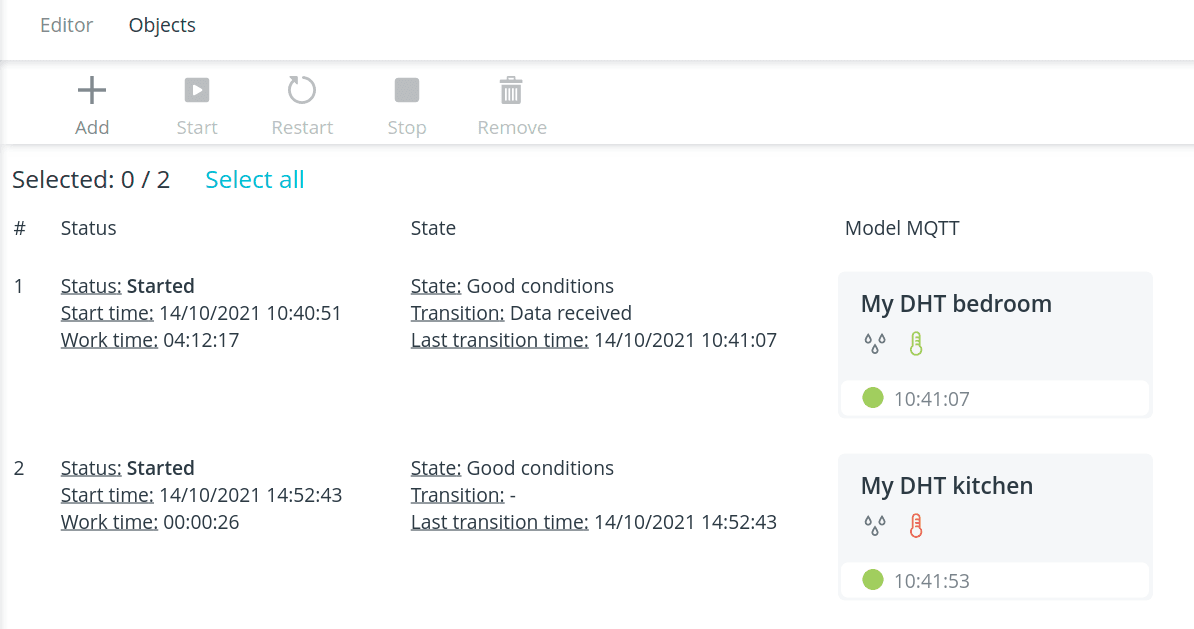
Now the Stop and Restart buttons are available for objects with a running automaton.
Stop. The Stop button will stop execution of the automaton. Button Restart
button is similar to the Stop and Start buttons and is used for restarting the automaton after making a deposit.
to restart the dispenser after changes made in it.
💡
If a script was created, saved and run, and then rebuilt and again
saved, in this case it is absolutely necessary to restart it, because otherwise the old version will be executed.
otherwise the old version of the automaton will be executed.
Detailed information about the execution of the automaton on a particular object can be found in the **Objects menu.
in the Objects menu.